It is a beautiful sunny day BUT cold none the less.
While I'm sifting through hundreds of pictures of what seems to be my two gorgeous doggies...
with attempts of finding the pictures I took whilst taking my most recent refashion to make instructions, I thought it would be nice to upload my first few projects that I undertook as a complete beginner, who am I kidding, I believe I still am!


I found endless tutorials on pinterest for making sewing machine covers but for some reason, I didn't really follow any instructions per se.
I saw this tutorial and ran away with ideas from there -->
 |
| Easy Sewing Tutorial from My Decoupaged Life |
I measured and designed what I wanted. I used cream for the inside and the sides and green for the front back and top. In between I used wadding. Unsure of the weight (is that right?) of the wadding because I have a bad memory. I can update this when I go back to the shop. Wadding was probably a little over the top, well it felt like it was, but I needed something and made use of what I had in the house (otherwise the house would start looking like a fabric store and I don't have room for it all). I kept my cover basic. I found that a lot of the wonderful covers that I have seen were very elaborate with quilting squares and embellishments (still yet to figure that out) and so on. I think I liked the Brittany's tutorial because she went with simple too. The colours were not too over the top and they complemented each other.
Anyway, I'm happy to create a tutorial for my sewing machine cover if it is needed or wanted. I may just update with one at a later date.
 The second project I set upon was an interesting one to say the least. It was my first refashion. I was looking through the charity shops for clothing and bed sheets to practice sewing on, practice all the different types of stitches, the tensions, etc. Something I thought was quite important. Well I'm not saying it's not, but I haven't sat down to practice yet apart from with refashions. Bed sheets were not so cheap at the charity shops. I paid almost £10 for double bed sheet and pillows - I have taken to it though and couldn't bare to chop it up (yet). So as I browsing my aim for clothes set in. I spotted in the shop window a gorgeous maxi skirt. the colours very autumnal:
It was size XL. I loved it, I LOVE maxi skirts... will I wear them? Barely EVER... and I have no idea why. So this got chopped up.
In fact in this picture I had already chopped it, but tried over lapping it to take a picture of it as a full skirt. I measured the length that I wanted it from my waist to my desired length and went from there. It was a little tricky because those lovely khaki green coloured ruffles are lace, so I attempted to make it so that it was symmetrical.

This is the front and it's the same on the back. I can actually make another skirt the same from the original AND very likely one or two skirts with the top half. I wear this a lot. I love it. However I will pay attention to detail with the second version that I make.
Mistakes that I made were:
- type of stitching used with material
- The waistband width (it is far too small)
- I accidentally chopped the petticoat (is that what it is called now?) lining on the wrong line, so it is stitched in 4 or 5 places.
I am up for learning, but I don't catch on with the lingo very easily (I do have reference books though) so I welcome any guidance or advice in those areas.
Finally, project number three is FINISHED!
This is great because I started it a couple of weeks ago and everything just seemed to have got in the way. I think as a beginner, I totalled a couple of days (without instructions). however I think anyone could do this in a day!
This is great because I started it a couple of weeks ago and everything just seemed to have got in the way. I think as a beginner, I totalled a couple of days (without instructions). however I think anyone could do this in a day!
This is the post that I am currently creating, altering and perfecting. The reason for this is, I saw a refashion that I LOVED. I wanted to do it BUT there were limited instructions (link below) but commenter's still asked for instructions.
Here is the much sought after refashion: and here is my close attempt:
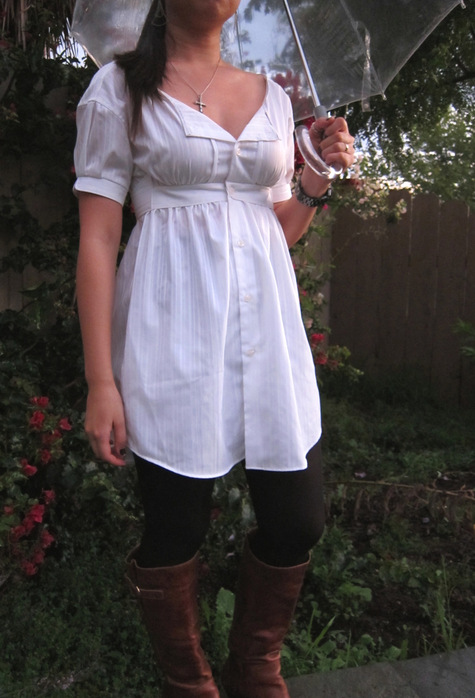 |
| Ellis Shirt Dress |

So, I cannot wait to post this!
See you soon!
Lily x x
No comments:
Post a Comment